

Results 1 to 10 of 15
-
21-12-2016, 19:11 #1User

- Join Date
- Jul 2010
- Location
- Witbank
- Age
- 59
- Posts
- 4,126
 Cement cast garden bowl tutorial for the gardener
Members, since not all of us can be on holiday I think it is prudent to give the home based gardeners something to avail their time with....


Here are a few steps to make your own cast cement bowls to enhance your garden .
Step 1
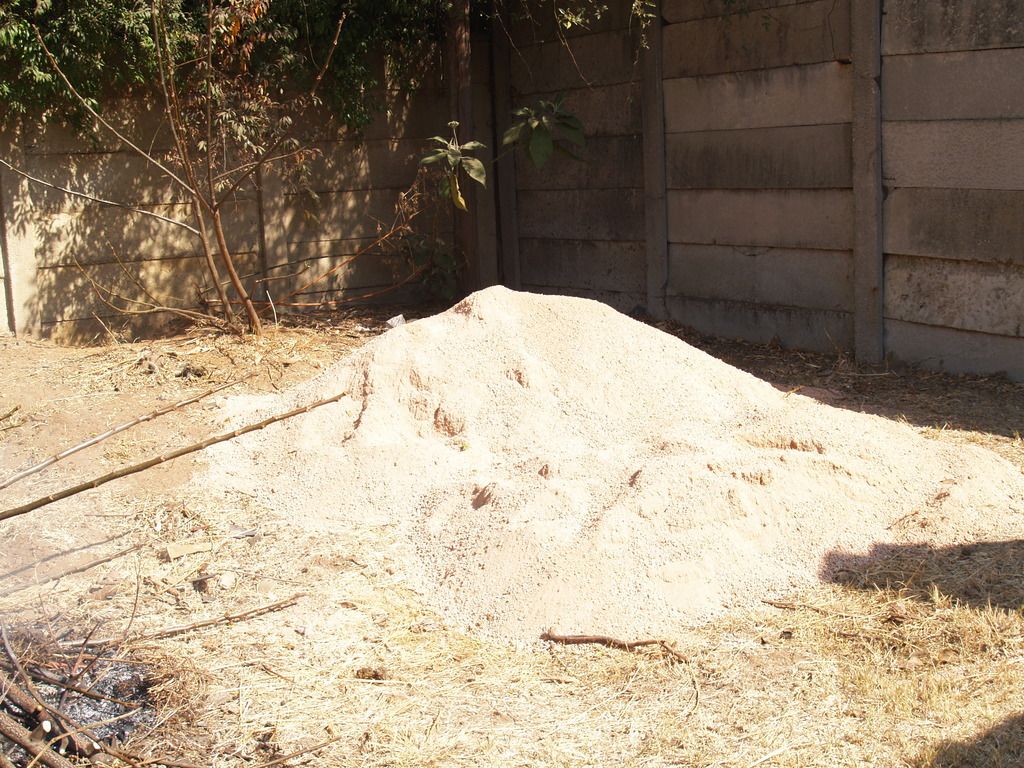
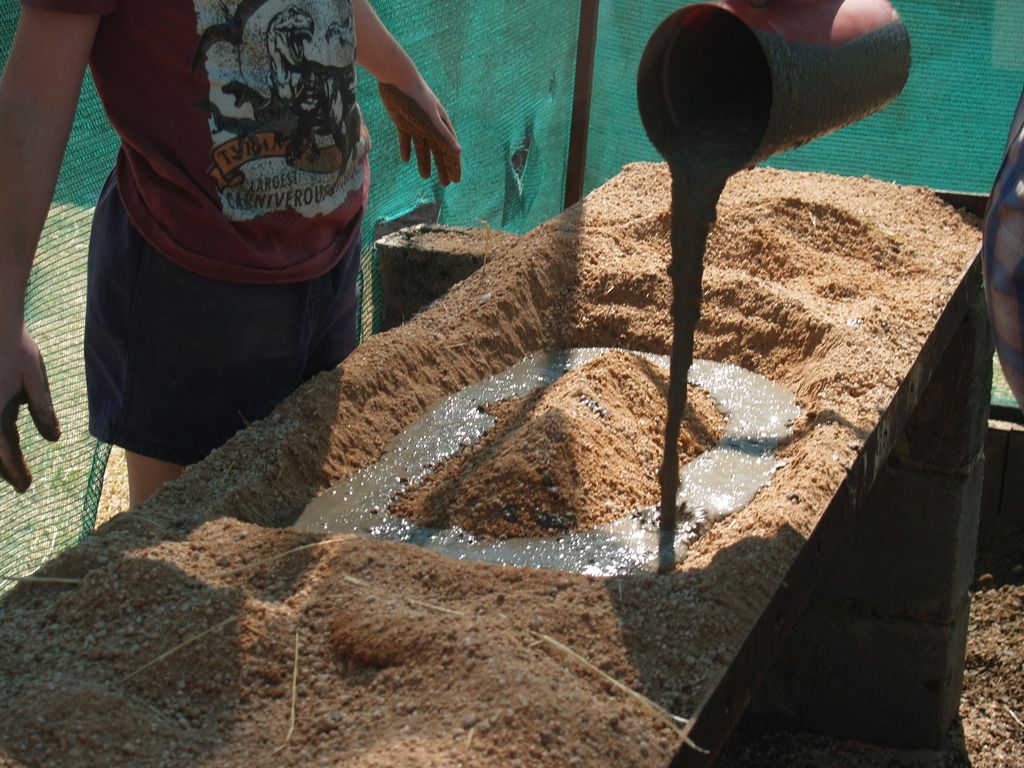
Get course river sand , building sand, fine gravel from a rock quarry , cement and use a 1:3 mix ratio...it ensure a strong bowl...you need to get hold of Sika water proof powder. You need to mix accordingly as per instructions.
Step 2
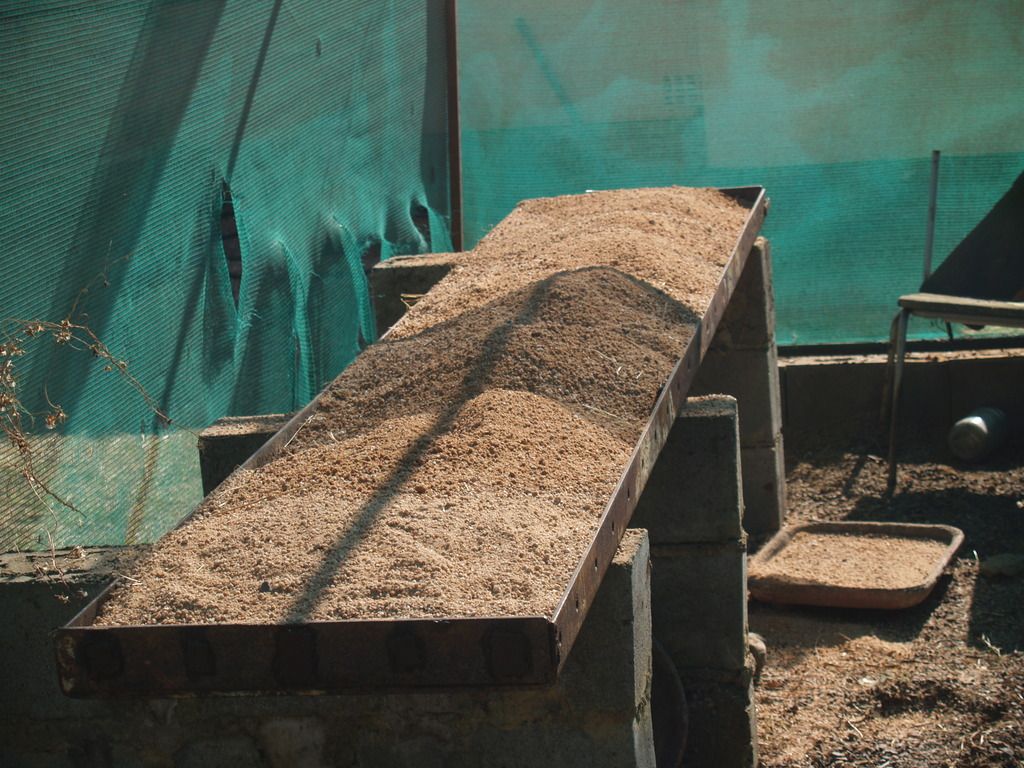
Get a long bowl about 100-150 mm deep to cast the bowls into...

Step 3:
Fill it up with course river sand:
Step 4:
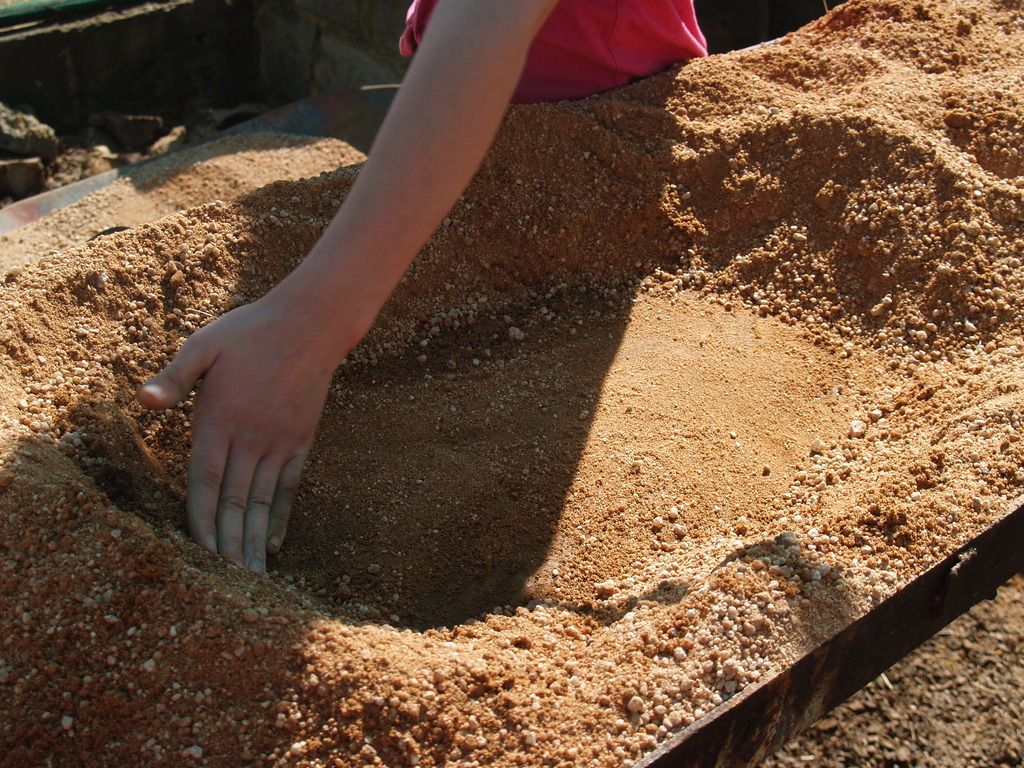
Dig out a bowl shape hole:
Step 5:
Leave a layer of sand 10 mm thick otherwise the cement will adhere to the steel bottom.
Pour the cement into the hole making sure it covers the whole bottom surface...
Step 6:
Build a island of sand in the middle of this cement base..
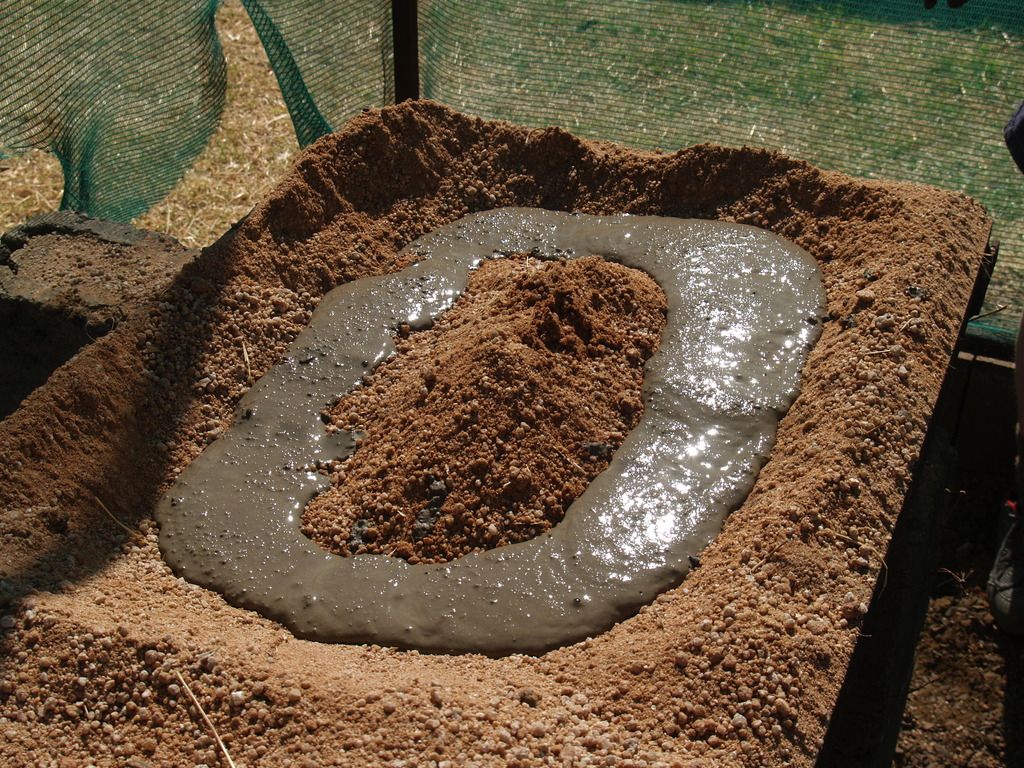
Step 7:
Pour the cement around the this sand island:
Step 8:
Use your hand/fingers and push the sand into the cement towards the sides..this is how you form the bowl
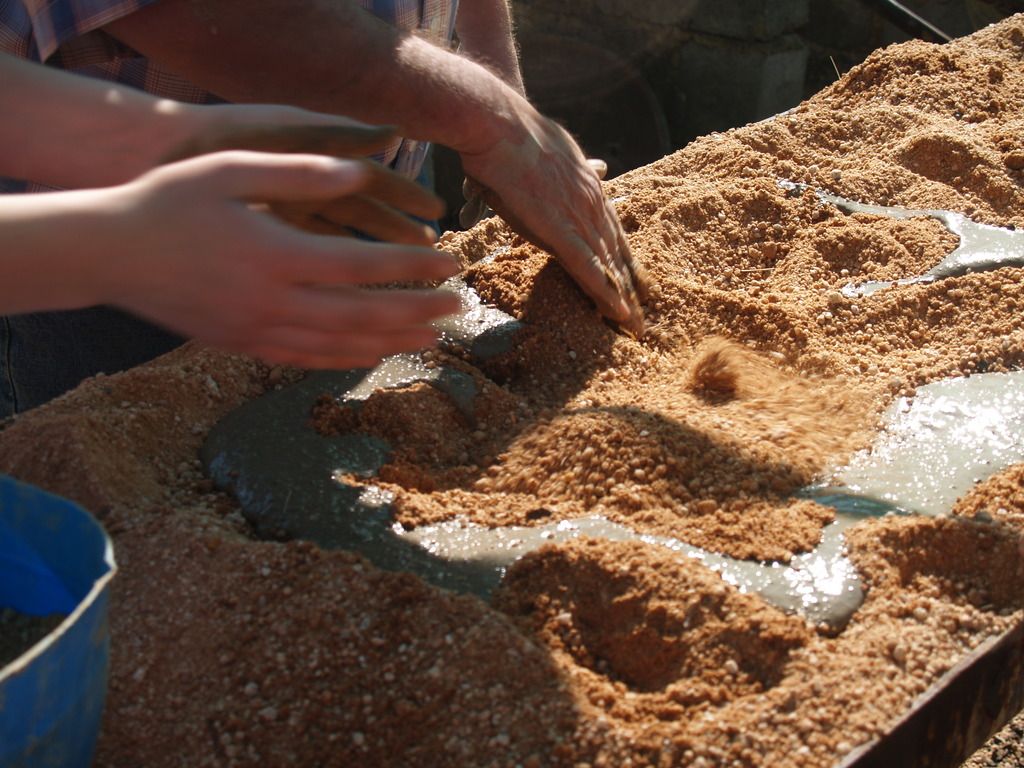
Step 9:
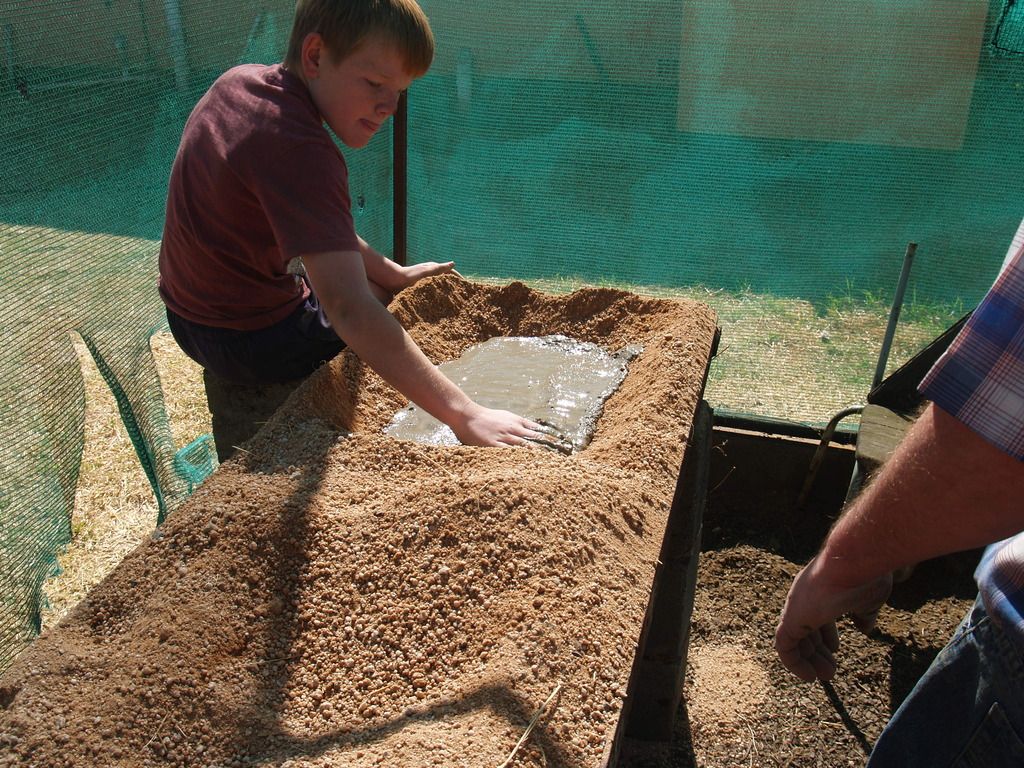
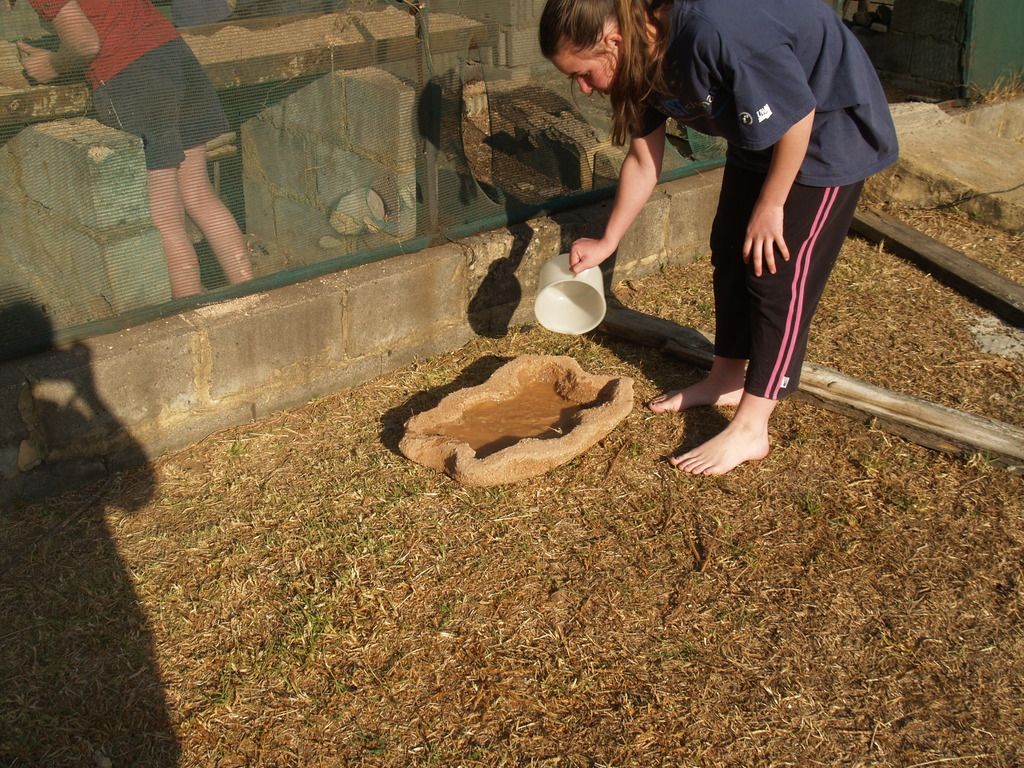
Cover the cement bowl with sand and leave for three days before removing the sand all around and from the bowl...be careful not to break it now it still is not fully cured.
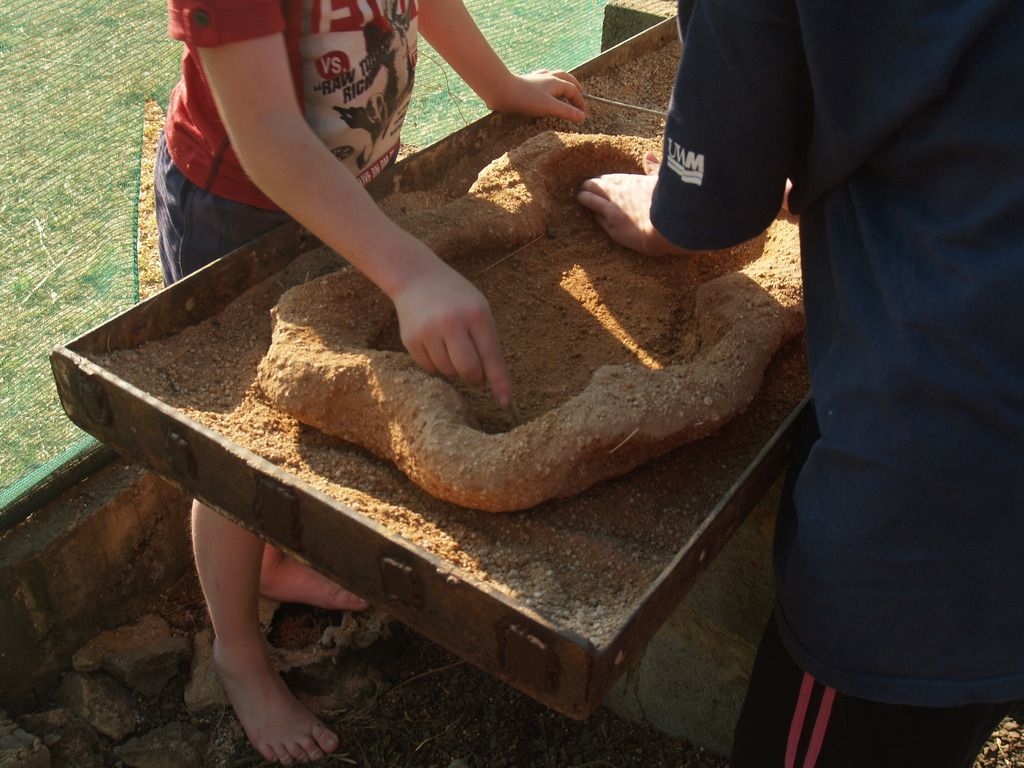
This is how it will look..fill it with water to ensure it cure and strengthen to solid.
Now it looks like this when fully cured:
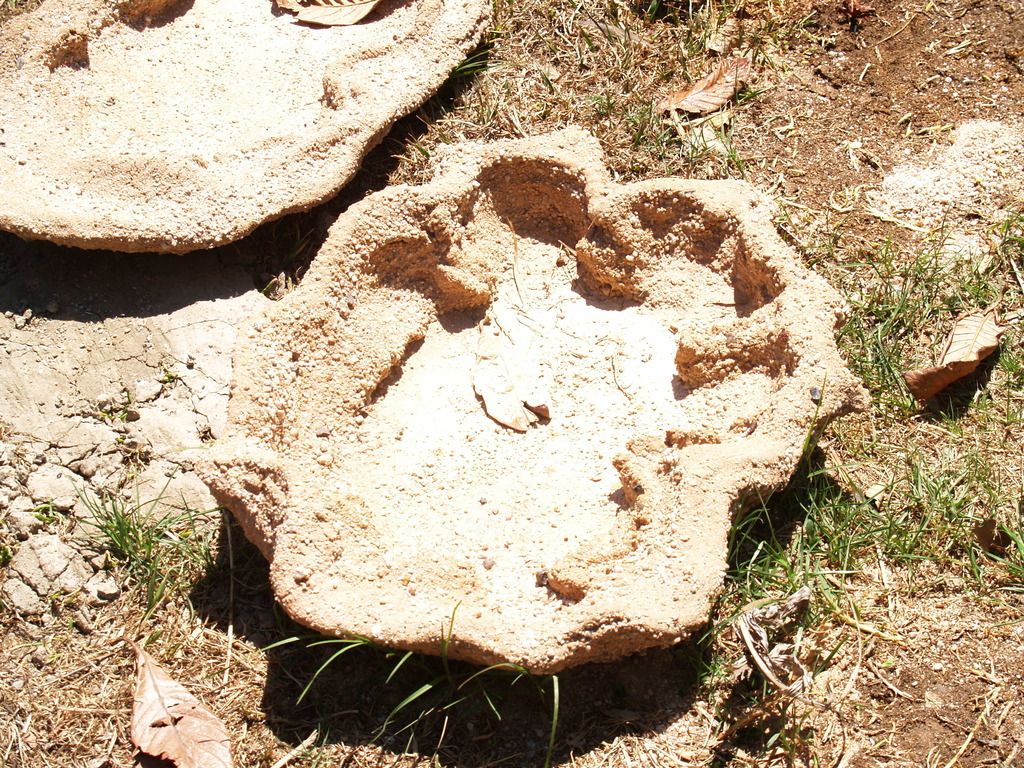
When we are finish it needs to look like this:
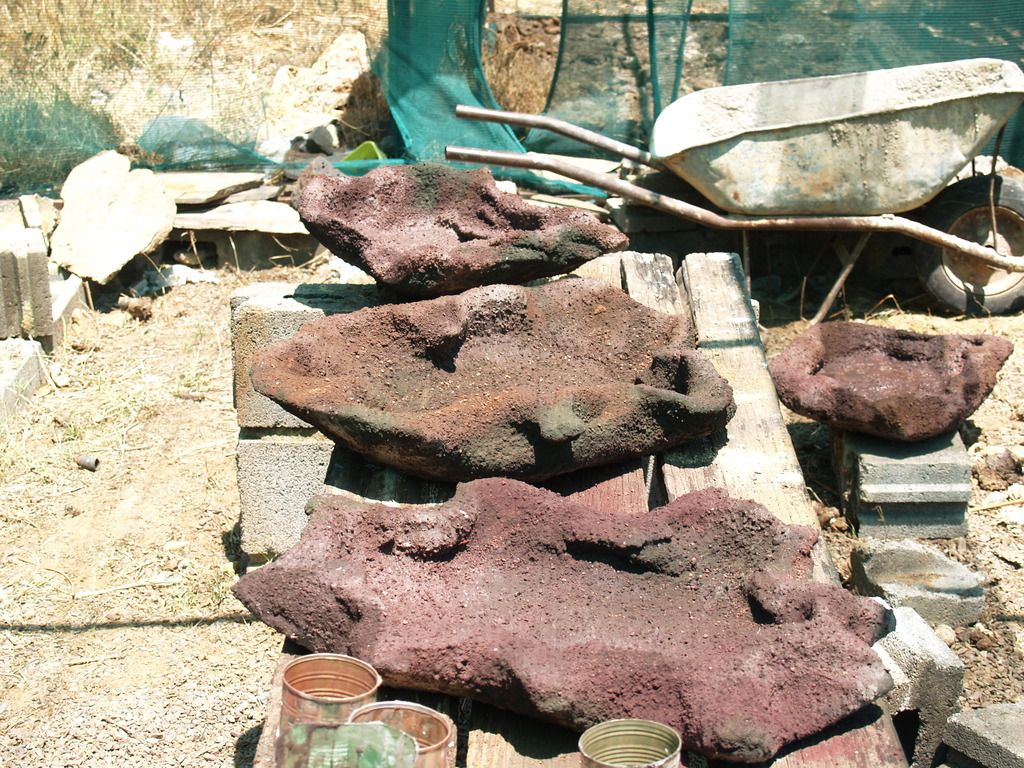
I will upload the next few coloring process steps tomorrow.
-
22-12-2016, 04:41 #2Moderator

- Join Date
- Feb 2009
- Location
- Alberton
- Posts
- 12,027
Thanks Gert. Very interesting.
-
22-12-2016, 06:02 #3User
- Join Date
- Sep 2013
- Location
- North West
- Age
- 56
- Posts
- 1,523
Re: Cement cast garden bowl tutorial for the gardener
Great thanks

-
22-12-2016, 06:46 #4User
- Join Date
- Jul 2010
- Location
- Witbank
- Age
- 59
- Posts
- 4,126
Re: Cement cast garden bowl tutorial for the gardener
Camouflage762/Kaptein L , it is a pleasure , these bowls really looks nice in a garden....I will explain the coloring method in detail. Although it is easy to make these bowls and really rewarding it is hard, physical work...
 Please do not use these bowls in a Coy -fish dam since the iron oxide coloring substance will kill your fish.
These bowls are water proof when you use the Sika water proof product and will keep water for a long time..you can use these bowls for Bonsai bowls as well , it really gives it a great look. Stacking these different size bowls and drilling 13 mm holes through them while fitting copper pipes you can make a nice water fall feature...uses are endless...
-
22-12-2016, 08:34 #5User
- Join Date
- Nov 2014
- Location
- Krugersdorp, West Rand
- Age
- 55
- Posts
- 2,237
Re: Cement cast garden bowl tutorial for the gardener
Very clever, thx for sharing, now I have something for my wife for XMas
-
22-12-2016, 12:01 #6User
- Join Date
- Jul 2010
- Location
- Witbank
- Age
- 59
- Posts
- 4,126
Re: Cement cast garden bowl tutorial for the gardener
I will upload the coloring procedures later today so you will be able to complete bowls for Christmas...You can purchase cement, different colors of oxide, red, brown , green, black, yellow, any color you need to mix to get different effects. The red oxide is your base color...mixing the red, yellow and brown colors give you other nice colors as well..the green mixed with brown gives you a color for moss..., remember the Sika powder to water proof the cement for the bowls...
Purchase a fine sieve to sieve the river sand to acquire fine gravel/grit to mix into your color container...
-
22-12-2016, 12:46 #7User
- Join Date
- Sep 2010
- Posts
- 1,577
Re: Cement cast garden bowl tutorial for the gardener
Thanks so much for this post. Is coprox the same as sika powder. I have some left after I did the tops of my walls?
-
22-12-2016, 19:02 #8User
- Join Date
- Jul 2010
- Location
- Witbank
- Age
- 59
- Posts
- 4,126
Re: Cement cast garden bowl tutorial for the gardener
Yes it will work...you need to mix it in with the cement dry cement before you start mixing. Originally Posted by feroze

-
22-12-2016, 19:23 #9User
- Join Date
- Jul 2010
- Location
- Witbank
- Age
- 59
- Posts
- 4,126
Re: Cement cast garden bowl tutorial for the gardener
Coloring process:
First you need to mix all your different color schemes with the sieved river sand..it must be small granules that you will mix with the different colors in small containers. I always start with the red oxide color as my base color....
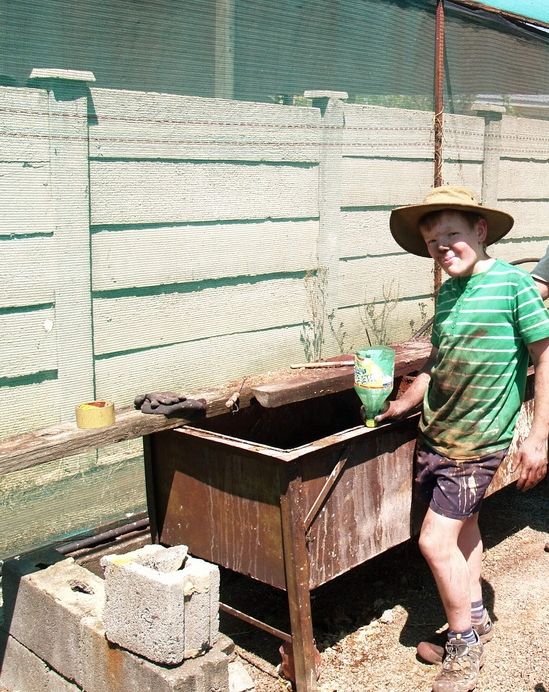
Now after you washed all the sand from the cured cement bowl you move to the following phase...mixing of the slurry cement ....
You need to have a deep container, wide enough to dunk the cured cement bowl into the cement slurry...
 Mixing the cement slurry:
It really is important to use plastic surgical gloves when mixing the cement..cement really eats your skin on your hands and has a dire effect on your skin...
Fill your container three quarters full with water..take a bag of cement and add cement to the water , start mixing until the mixture is a thick slurry...this takes a while since cement does not mix easily with only clean water...
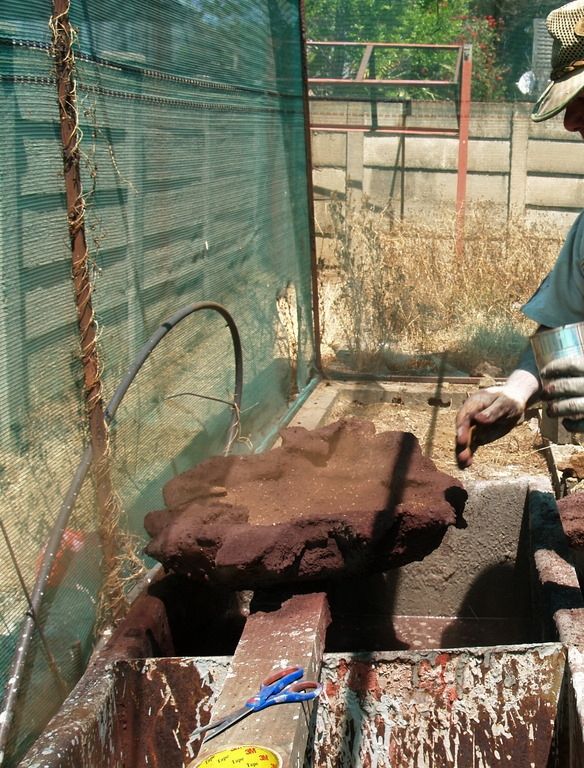
Take your bowl. dunk it into the cement slurry, make sure you work the slurry into the surface of the bowl....
Take it out , put it on a table, start with the rd oxide mix and throw the mix onto the bowl `s surface...the next morning you will want to visit a doctor for the pain you experience in your back and arms....
Now , start throwing the next color mix you want..you will find your own preference of how your bowls need to look like...
Take a mist spray bottle and spray the bowl to infuse the colors..leave the bowl to cure over night...and keep it in the sun the next two days ....
Experimenting will ensure nice type of colors..enjoy and send me photos of your bowls...
-
22-12-2016, 20:39 #10Banned
- Join Date
- Jun 2014
- Location
- Pietermaritzburg, kzn
- Age
- 41
- Posts
- 2,387
Re: Cement cast garden bowl tutorial for the gardener
Very very nice

 Reply With Quote


Bookmarks